UV glue is used to adhere to a variety of materials from stone, metal, water reservoir tanks, and more. It can be used to attach small trinkets onto tiles or even create mosaic art with the use of tile grout as well as UV glue.
If you have any experience working with this type of adhesive, then you will know how tedious it can be to let the adhesive dry when your job requires you to keep going and there is no time to wait for hours to pass.
Are you looking for different methods to cure UV glue without a lamp? If yes this article will tell you the methods of how to cure UV glue without a lamp.
Contents
Methods Of Curing UV Glue Without Lamp
Following there are three methods to cure UV glue without a lamp. So, let’s discuss them.
Method 1: Curing UV Glue With Sunlight
1. Work In A Well-Ventilated Area
Before you start working, make sure that you have a nice and well-ventilated work area. This is because UV glue emits some harmful chemicals which can irritate your eyes, nose throat, and lungs if they are exposed to it for too long.
Hence, allotting yourself a good work area will help you avoid such problems and give yourself a much more comfortable time working with UV glue.
2. Clean The Surfaces
Make sure that the surface you are going to glue is clean and free of dust or dirt before application. This will ensure a stronghold between two surfaces, especially if it is going to be used outdoors. Use an alcohol swab for this process as it cleans the surface and dries quickly.
3. Use The Right Amount Of Glue
Before you start applying the adhesive, make sure that you use the right amount of it for your project. This is because using too little or too much glue will not let it cure properly and might even lead to a multitude of problems.
For example, if you have too little adhesive then there is an increased chance that it won’t adhere properly to your substrate or work surface and will not cure properly. On the other hand, using too much glue can cause lumps which can be difficult to spread throughout your project.
4. Use A Spreader
If you are applying the glue with your hands then you’ll find that there’s a high chance that it will not stick properly. This is because too much or too little adhesive can make it very difficult for the adhesive to stick and adhere evenly throughout your project.
To work around this problem, use a spreader to even out the adhesive as you apply it to your surface. This way, the even distribution of the adhesive will help it cure properly without any lumps and bumps.
5. Keep It In Direct Sunlight
For best curing results, try to keep your UV glue out in direct sunlight for 5-15 minutes or until it becomes clear and tacky. If you have a larger surface area that requires curing, then just do it in smaller parts to allow for a uniform curing.
6. Keep Cleaning It Until It Cures Properly
When you are applying UV glue onto your materials, you’ll probably see that the adhesive leaves some residue which can be difficult to clean off or work with later on. For best results, it is recommended to keep cleaning the adhesive until the substrate becomes clear enough to work with. You can use rags or paper towels for this purpose so you don’t have to waste too much time removing the glue.
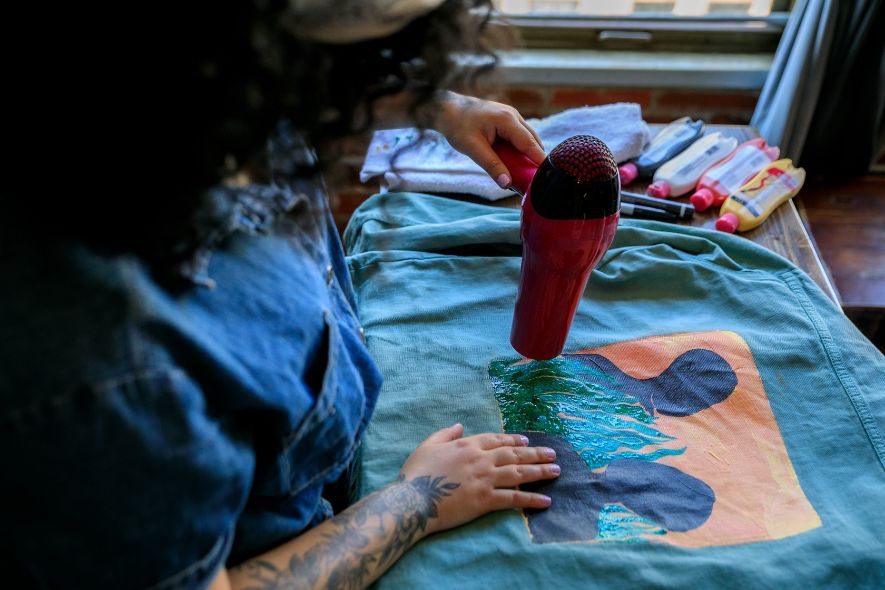
Method 2: Curing UV Glue With Hair Dryer
1. Prepare The Surface
Before you start, make sure that the surface you are going to glue is clean and free of any dust or dirt on it. Now, if you are working with wood or plastic then there is no need for further preparation before gluing.
However, if your work surface is metal or glass then you will have to sand it until the surface is rough enough for the adhesive to bond properly.
2. Apply UV Adhesive
As with using just your hands, you can also use a spreader to evenly distribute adhesive over your work area. Once you’ve applied the glue, let it sit for about 5 minutes so that it becomes clear and tacky.
3. Use The Hair Dryer
As the glue starts to dry, you will see that it emits a lot of fumes as well as some residue which can make your work area look messy and difficult to use. To counter this problem, switch on your hairdryer and start blowing hot air over the adhesive. Keep doing this until it becomes clear enough to use.
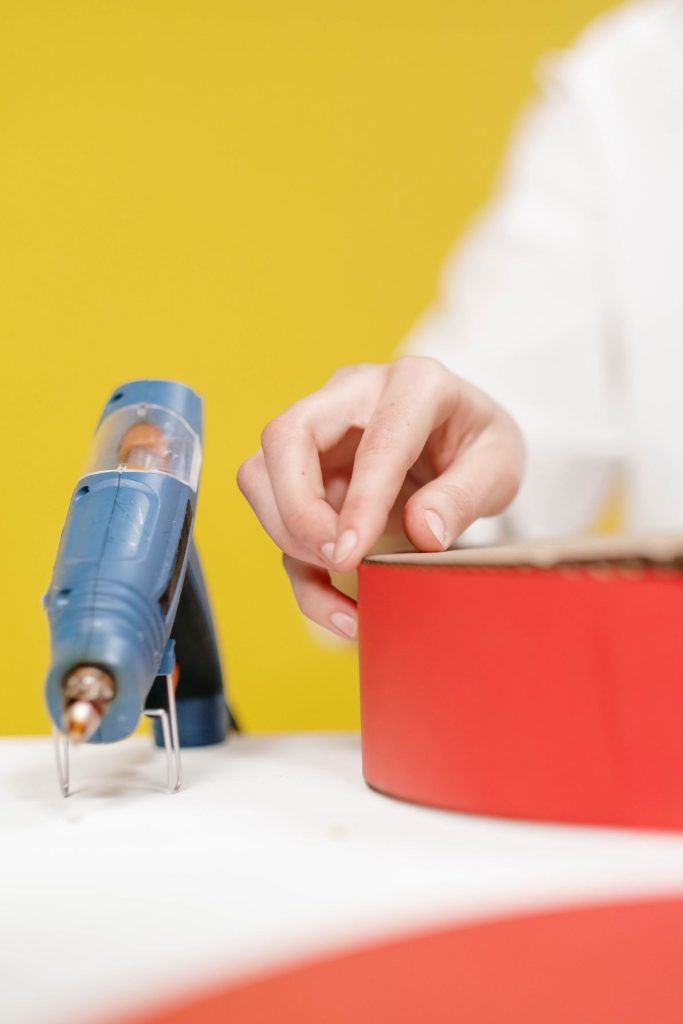
Method 3: Curing UV Glue With Hot Glue Gun
1. Prepare The Surface
Before applying the adhesive, make sure that your surface is clean and free of any dust or dirt on it. Apply some hot glue over this area so that it becomes an even base for you to start working upon.
2. Use The Hot Glue Gun
Now, this might sound a little weird but using a hot glue gun is one of the best ways to cure UV glue without a lamp. Simply load up the hot glue gun with your adhesive and start spreading it across your surface evenly. Finally, let it dry for about 10 minutes so that it becomes clear enough to work with.
Benefits Of Curing UV Glue Without A Lamp
Here are the benefits of UV glue without a lamp. So, let’s discuss them.
1. Saves Time
The most obvious advantage of curing UV glue without a lamp is that it saves time. Think about how long it takes to dry your adhesive with the use of a lamp and you’ll realize how tedious this process is. Instead, you can choose to not have a light source for curing and hence save yourself from the hassle of having to wait.
Curing UV glue without a lamp allows you to work much faster. When you have many tiles or other items that need to be grouted, gluing them requires time if you are curing each one with a lamp.
2. Environment Friendly
By not using a lamp for curing your adhesive, you are preserving the environment. This is because most lamps require electricity to run and if you keep one on all day, it can pose be an electricity guzzler. Not only will you be saving energy but also money in the process by not requiring a lamp.
3. Cost-Effective
UV glue is expensive and you might need more than one tube of it for a big project. By curing your UV glue without a lamp, you will be saving more money as there’s no need to buy an additional light source or electricity to accommodate the adhesive curing process. Instead, you can merely use the natural sunlight and save more money in the long run.
Reference Video – How To Use A Hot Glue Gun
4. Easy To Use
You don’t need to be an expert in the field of UV glue application to know how to cure it without a lamp. By simply following these simple steps, you will be able to do it yourself without any hassle. All you have to do is keep your UV glue out in direct sunlight for 5-15 minutes or until it becomes clear and tacky.
If you have a larger surface area that requires curing, then just do it in smaller parts to allow for a uniform curing.
5. Great For Outdoor Projects
If you are working on an outdoor project which requires gluing, then it is best to cure the glue without a lamp. Since UV glue contains some harmful chemicals such as ethyl cyanoacrylate which can be dangerous when used near open waters and bodies of water; curing it with sunlight will let you work safely on your outdoor projects.
6. Less Odor
UV glue is known to emit a strong odor which most people don’t like. If you are particularly sensitive to different odors, then curing your adhesive without a lamp will help you avoid this problem and work in a more comfortable environment.
7. For Quick Curing Of Small Amounts Of Glue
If you have only a small amount of UV glue to cure, then curing it without a lamp is an excellent option from which you can choose. Just keep your adhesive out in direct sunlight for 10-15 minutes and you’ll find that your UV glue cures faster than usual.
FAQ on Curing UV Glue without Lamp
1. Will UV Glue Dry On Its Own?
UV glue can dry on its own but this takes a lot of time and will not work properly. For example, if you are working with wood then it might take up to a whole day for the glue to cure properly. This is because the surface has a lot of moisture which slows down drying time considerably. In other cases, if there is a lot of dirt on your surface then it might just not cure properly.
2. How Do You Harden UV Glue?
UV glue doesn’t need to be hardened as it is a contact adhesive. However, if you are working with a large surface area then you will have to sand it down before using the adhesive on your project. This is because the sanding process creates a rough surface which makes bonding with UV glue much easier. You can also use a primer before applying the glue too.
3. How Long Does It Take UV Glue To Cure?
In most cases, it takes about 5-15 minutes for UV glue to become clear and tacky. However, if your surface is very dirty then curing time will be prolonged accordingly. In fact, in some cases, it can take even a whole day for the glue to properly bond with the substrate.
4. How To Cure UV Glue Without UV Light?
In some cases, you might be working on a project where UV light is not readily available. This can be during rainy weather or at night time when you need an adhesive that will stay tacky until it dries. In such a case, you have a few options to try out a hairdryer, hot glue gun, or soldering iron.
How To Cure UV Glue Without Lamp – Conclusion
UV glue is a very versatile adhesive that can be used for almost any purpose. However, it does have its limitations, and curing without a lamp can be tricky at times. In such cases, you can use the methods mentioned above to speed things up as well as avoid unnecessary wastage of time and supplies.
References
- https://www.light-sources.com/blog/uv-glue-curing/
- https://www.permabond.com/resource-center/curing-uv-adhesive/
- https://gorillaoutput.com/can-you-cure-resin-without-uv-light/

I fell in love with crafts & fixing things when I was 11 years old – after discovering the world of blogging, I am combining my passions to present the world with well-researched guides & reviews about everything related to adhesives & glue.